It is important that you read this before attempting any
pioneering project
Pioneering can be both enjoyable, and
rewording, learning the different knots and lashings
can be a bit daunting at first, but once learnt the number of things you can do
with this new found skill is almost endless. But remember before you
start any pioneering project, no matter how small, you must first consider all
the safety aspects. Is your equipment in good condition and suitable for your project. Are you competent enough to do the job, or do you need someone better
trained to help? Although pioneering is fun, its not without risk and should always be dun under proper supervision! and you must never start any pioneering project without first doing a risk assessment.
Before you can start doing any pioneering there are a number of knots, hitches, and lashings you must learn. Below in the different descriptions my intention is to name each knot, and lashing, so you can look them up in books or other websites, or better still attend one of my courses, or invite me to your venue, and I will personally show you haw to tie and use them.
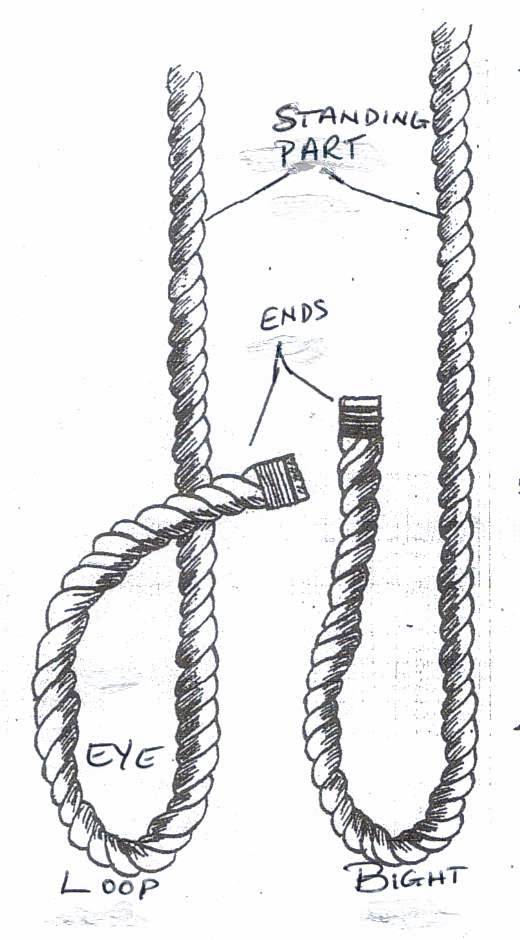
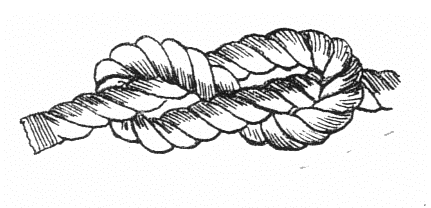
Before we can start to learn how to tie knots, we must first learn the basic parts of a rope and what goes into making a knot/hitch. The Standing part, this is part of the rope that stands above a loop or bight, the opposite to the end. The End is the opposite to the standing part, the loose part of the rope. The Bight this is the name we give to an open circle or the middle of a rope. Finally the loop this is a closed circle in a rope that forms part of a knot. OK what is a knot? If its not a Bend this is something that we use to tie one rope to another. and if its not a Hitch, something we use to fasten a rope to a post or other object, then its a knot. You can have a figure of Eight knot, this is probably the best known of all knots, and one what we term as a Stop knot,
The Figure of eight knot
On the left is the Figure of Eight knot as described earlier and its tied on the end of a rope to stop it slipping through a loop or block. It can be used as a temporary knot to stop a rope fraying.
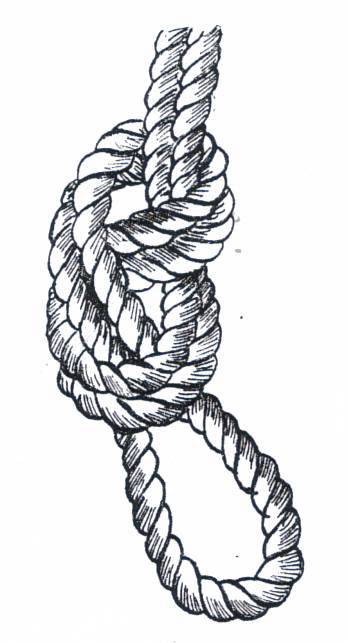
The Figure of eight on the bight
Different forms of this knot are used by fishermen to secure the
hook to the end of a line.
If tied on the bight as on the left it makes a quick and easy loop.
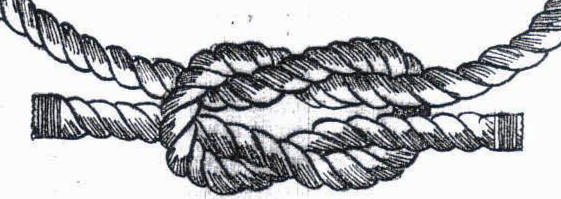

The Reef Knot
This is one of the most popular knots used for tying the ends of two ropes together. it can also be used in first aid for tying the ends of a sling, or bandage together. Its a good knot to use because it will not jam, and is easy to untie. But this knot shouldn't be used if the strain comes at an angle
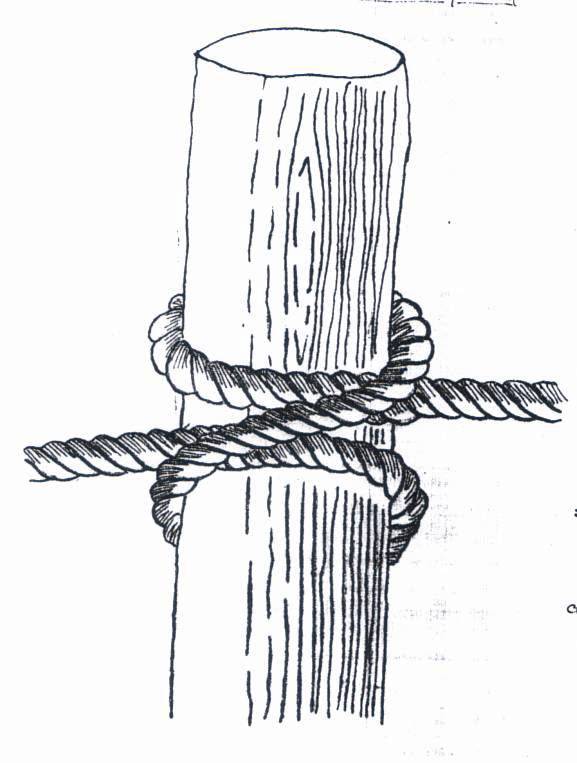
The Clove Hitch
This is not a knot but a hitch, and is use at the beginning and end of most lashings. Its also useful for fastening a rope to a post, because it will hold fast but can be easily untied by twisting it in the direction of what was the strain
The Round Turn and Two Half Hitches
This is a very secure knot and one I use to secure a rope to a post, or stake when building bridges or towers. I also use it to fasten the end of a rope that will have to take a strain usually from a pulley or block, its also a good knot to use for fastening the first end of a rope to a tree for a hammock or a commando bridge, although for use with a hammock I would use slip loops on the end of the turns.
Now lets look at the lashings
When building pioneering constructions you would normally use four lashings, but these four can be tide in a number of different ways depending where you live. I am only going to show you pictures of the finished lashings, you can fined more information about each individual lashing by searching the internet, but feel free to ask me any question's you may have.
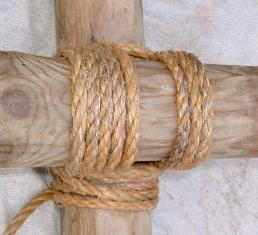
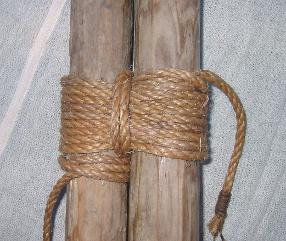
First the Squarer Lashing this is for fastening one pole/spar to another, and is used in the construction of most camp gadgets etc. Normally this particular lashings load is from above, so the strain is on the vertical spar or the under side of the cross spar, because of this we start with a clove hitch under this spar to give it maximum strength, Its tied in the normal way but finished by twisting the end up the standing part, again for added strength.
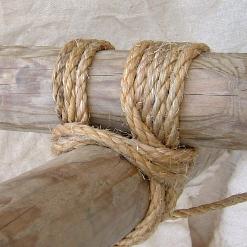
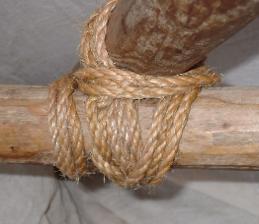
Second the Diagonal lashing this lashing is better used when the spars are to be set diagonally as in the photo and is normally used on spars that cross in the centre of a trestle or when the strain on them tends to push their ends apart This lashing is tide in a similar way to the square lashing but starts with a timber hitch round the centre.
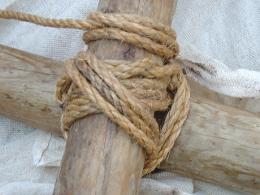
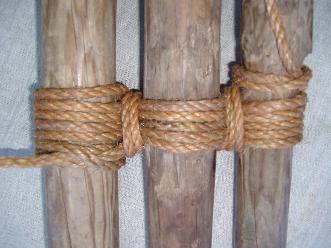
Third is the sheer lashing
The sheer lashing is used to lash together parallel poles to extend them or to make the top of an A frame or shear leg's, its one of the simplest of lashings to tie and starts as most lashings with a clove hitch on one of the spars
The fourth the
Figure-of-Eight Lashing
This is used to fasten three
poles together to make a tripod or wash stand etc. there are two different ways
to do this lashing depending what you are using it for, normally you would start with all
three spars level at the top and after tying the lashing just open them out,
this is ideal for something like a wash stand but you would tie it
lower down.
The purpose of all the articles within this website that contain instructions, advice, or how-to content is to present facts, and not to train.